
A drain flange is an essential component in your bathroom or kitchen skin drain assembly. A leaky drain flange can quickly lead to water damage in your kitchen or bathroom. This is why if you have a faulty drain flange, you’ll need to replace it as soon as you can.
The good news is that drain flanges are easy to install and repair. Even if you are not a DIY person, this project should not take you more than half an hour from start to finish. Here is our detailed guide on what a drain flange is and how to replace it.
Table of Contents
What is a drain flange?
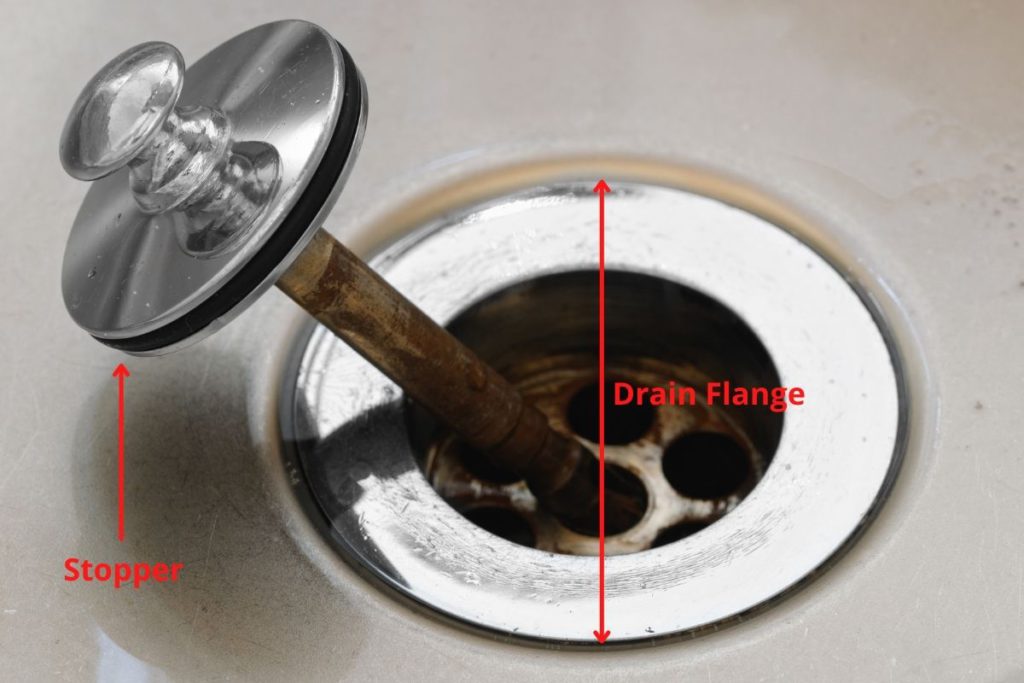
A drain flange is the visible drain portion of a sink, bathtub, or toilet. It is a part of a drain that seals the upper side off from the other plumbing components below, creating a tight seal. It also sits within the drain to provide attachment for other plumbing fittings. Typically, drain flanges have a threaded design and an attachment section where the drain pipe is connected.
The edge of the drain flange is usually visible as a lip around the edge of the drain. A short length of pipe drops out below it, connecting it with the rest of the plumbing. During the installation of drain flanges, both gaskets and plumber’s putty are used to prevent leaks. The flange is usually pushed into the drain opening and into the putty until any excess putty is pushed out around the drawing flange.
Most drain flanges come in a two-piece design that includes the flange and a collar. The collar can be threaded or popped into the bottom of the flange (depending on the design of the flange) and tightened against the sink to properly secure it.
General information on how to install or replace a drain flange
Drain flanges are essential parts of drain installations. They, therefore, have to be installed correctly to prevent leaks and reduce the risk of other problems.
In most cases, drain flange replacements are readily available from hardware stores. They also come in standard sizes, making them easy to swap out when they need to be replaced.
How to install a drain flange?
Depending on the design of the drain flange, it may need to be popped or screwed into the drain. Follow the following steps to install a drain flange:
- Apply a thin layer of plumber’s putty around the edge of the drain
- Push, screw or use a drain wrench to put the flange into place. The putty will ensure that it is tightly connected to prevent rocking and to stop the flange from rocking from side to side.
- Fit a trap or plug to the flange to keep debris out of the drain and allow the drain to be plugged as needed.
Drain flanges come in standard sizes and select your size depending on how it would connect with your existing plumbing fixtures. These standard sizes are interchangeable between manufacturers, so you do not have to get everything from the same brand.
Once the drain flange is pushed into your plumber’s putty, you will usually have to place a gasket up and over the bottom of the flange and slide the connecting ring onto the bottom of the flange. Tighten the ring until it is snug, and it will squeeze out any excess putty from the top. Wipe off the putty, then connect the drain pipe.
Once your drainpipe is connected and fastened to the bottom of the flange, don’t forget to test the system for leaks by running water for a few minutes. You can also plug the sink and allow it to sit filled with water for a while as you check for leaks around the flange.
How to replace a drain flange?
Sometimes, you may want to remove and replace a drain flange or an attached fitting. The removal process will depend on how the flange was installed. However, generally, here is how to do it:
- Place a bucket under the plumbing to catch any drips or leaks. This is essential to safely unscrew any fittings under the sink.
- Loosen the fittings and look up at the drain flange from below. You should be able to see whether it needs to be unscrewed or popped out by tapping from below.
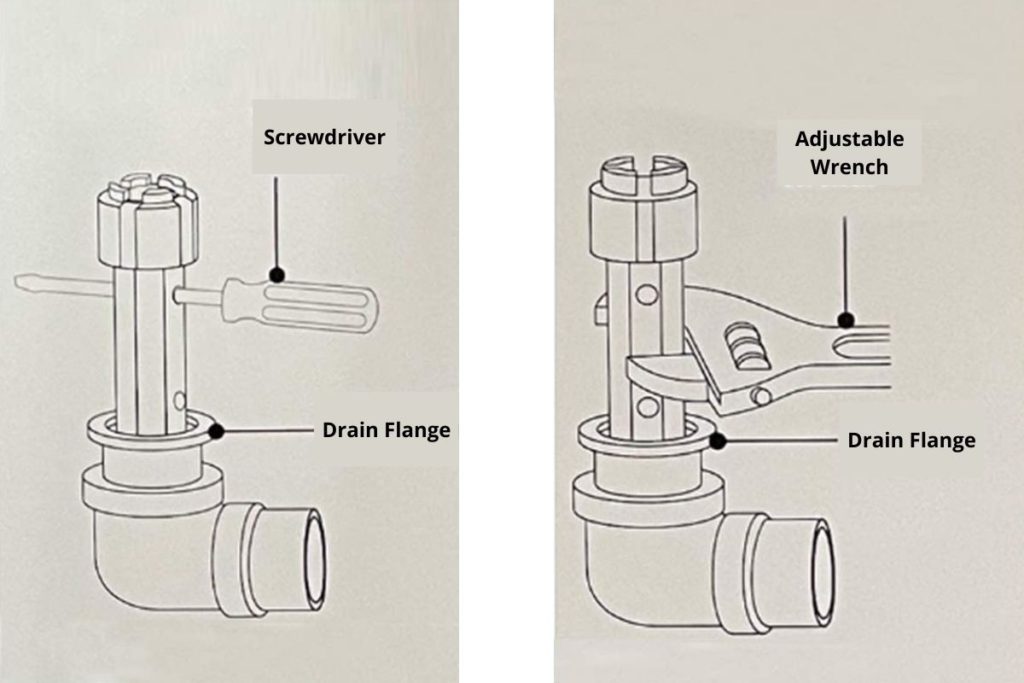
- Remove the drain flange by either popping it out, unscrewing it, or using a drain wrench.
- Clean the area around the drain where the flange had been placed.
- Reapply the plumber’s putty to make a tight seal and prevent any leaks before replacing the drain flange.
As you replace your drain flange, consider the color, material, and finish you use to ensure it matches what you had before.
Most drain flanges are made of metal and have a shiny finish. However, there are also drain flanges made of plastic blends and polymers. Today, drain flanges also come in various colors that allow them to match sink and granite countertops. Colored drain flanges can also blend seamlessly with your sink, giving it a unique look.
Modern drain flanges also often come with a stopper or a screened basket, adding an extra layer of functionality.
It is easy to care for and maintain your drain flange. You should be able to get away with only light maintenance, such as wiping it down to prevent scratches and damage. Avoid using harsh cleaners as they can strip off the shiny finish or wear off the material of the flange.
If you regularly use corrosive materials in the drain, periodically inspect the entire plumbing system for early signs of potential problems that can lead to possible leakages down the road. Replace components like drain flanges as needed before they start to fail.
Sink flanges: what they are and how to install or replace them
Sink flanges are drain flanges designed for sinks like your kitchen sink, for example. They connect the sink drain to a section of pipe called a tailpiece, creating a tight seal. Sink flanges are made of metal and sit around the edge of the drain. They usually have a grid-like section over the top of the drain like a strainer. The role of the sink flange is to prevent water from leaking out when you run the faucet. A leaky sink flange will allow water to leak down into the area below your sink.
How to install a sink flange
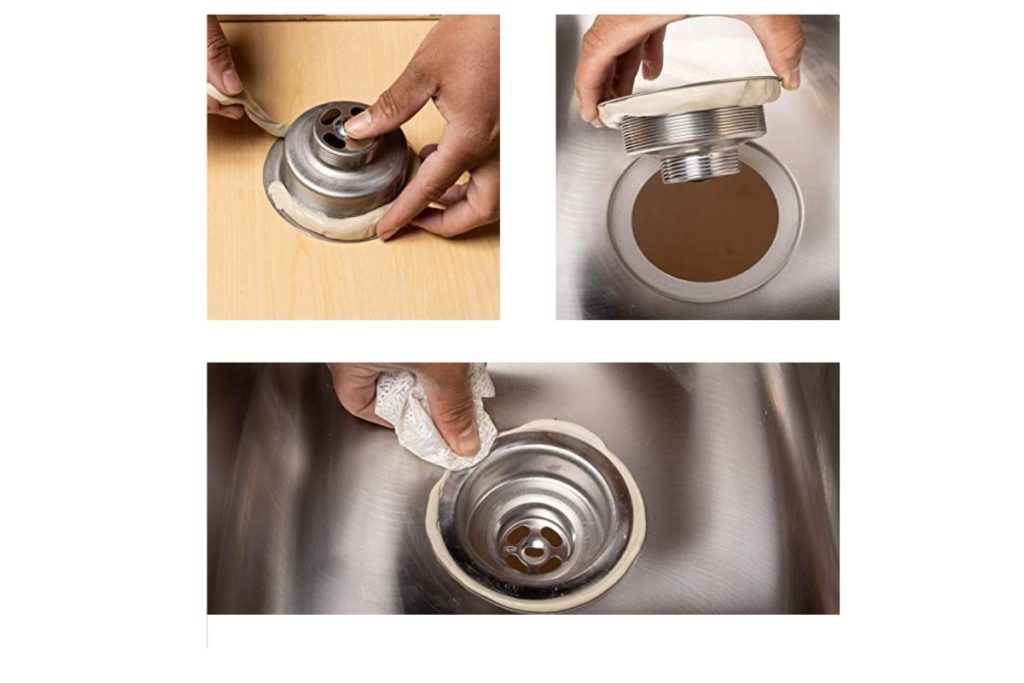
To install a sink flange for the first time, the first thing you’ll have to do is apply a bit of plumber’s putty around the drain opening. Make the putty around 0.25 inches thick.
Depending on the sink flange you have, you can now either screw it into place or press it down firmly into the hole. Your sink flange may also come with a nut and washer that you’ll need to screw on with a pair of pliers to ensure that they are nice and tight.
Ensure that the edge of the flange is flat against the bottom of the sink, then wipe off any excess putty. You can now attach the bottom of the sink flange to the tailpiece.
How to replace a sink flange
If you want to replace a sink flange, the first thing you have to do is disconnect your old flange. To do this, you can either unscrew it or pop it out, depending on the type of sink flange that you have. If you have a metal tailpiece attached to yours, you may have to use a tailpiece to unscrew it. Ensure that your water faucet is off and you have a bucket below your assembly to prevent any nasty surprises.
Next, unscrew the nut holding the sink flange in place. If there is rust holding it in place, tighten it first before loosening it to break any stubborn rust off. Once the nut is removed, pop the sink flange up out of your drain hole. Scrape off any dried putty, then install your new sink flange as directed above.
How to replace a bathroom sink flange
To remove a bathroom sink flange, follow the steps below:
- Place a bucket under the sink to prevent nasty surprises as you unscrew the fittings under your bathroom sink.
- Remove the tailpiece and any other fittings as needed.
- Unscrew the nut holding the bathroom sink flange in place
- If your bathroom sink drain has a stopper attached, unscrew and remove the stopper
- Remove the drain flange by either popping it out or unscrewing it
- Scrape off any dried plumber’s putty and clean the area around the drain where the flange had been placed.
- Reapply the plumber’s putty to make a tight seal and prevent any leaks before replacing your bathroom sink flange
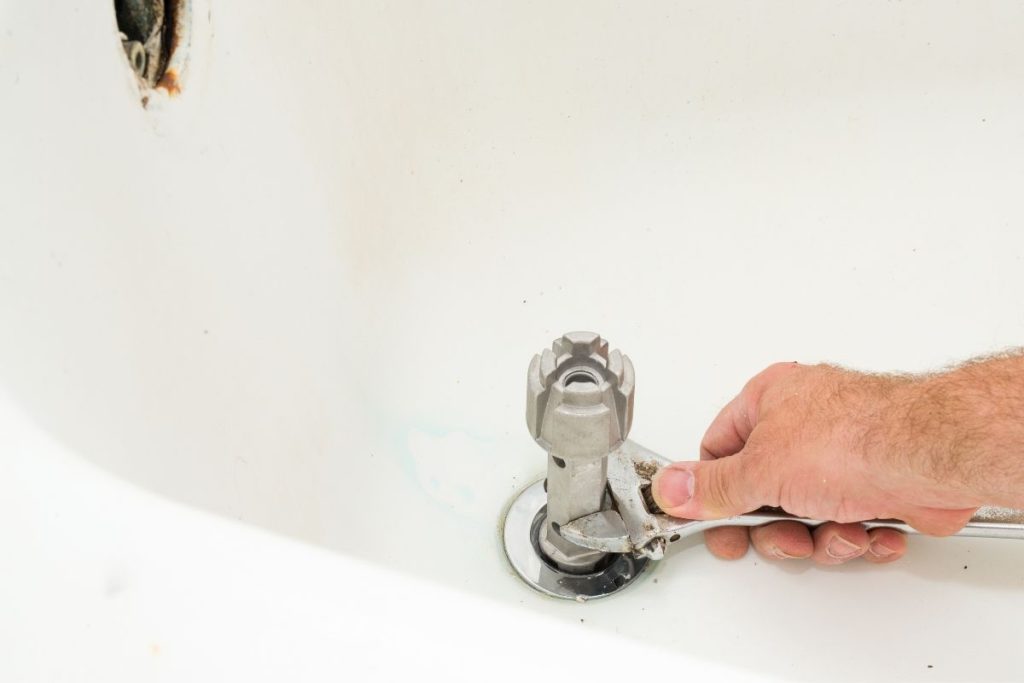
How to install or replace a bathtub drain flange?
A bathtub drain flange is the part of your bathtub that contains the drain stopper. To install a new one, you first remove the existing stopper and flange.
Bathtub stoppers come in various designs and styles. Therefore, you have to know what type of stopper you have (toe touch, push-pull, flip it, lift and turn, pop-up), then refer to your manufacturer’s instructions about removing it. Once the stopper is out of the way, installing a new bathtub flange is pretty straightforward:
- Use a tub drain removal tool to remove the old drain flange. Tub drain removal tools look like dumbbells, with each end sized differently for the two types of tub drain sizes.
- Insert the correct size into your bathtub drain flange, then rotate it until it is well secured in the flange.
- Use a pair of pliers to twist the tub drain removal tool counterclockwise until the old drain flange is off. Be careful not to damage the finish of the tub.
- Inspect the gasket between the drain shoe and the tub with the old bathtub drain flange off. If it is brittle or appears worn out, replace it with a new gasket by prying it out with a screwdriver and sliding the new gasket in.
- Remove the old plumber’s putty and clean the drain opening with a rag to remove dirt and debris.
- Place a 0.25-inch roll of putty along the new flange’s bottom edge to seal the seam between the drain flange and the upper side of the tub.
- Place the new bathroom drain flange by first popping it into the opening, then turning it by hand, and then using the tub drain tool until it is nice and tight.
- Use the pliers with the tub drain tool to add another quarter turn to the drain flange.
- Remove any excess plumber’s putty, then reinstall the drain stopper according to the manufacturer’s instructions.
What about toilet flanges?
Yes, toilets also have flanges. Flanges in the toilet are also called closet flanges. Closet flanges are located on the underside of the toilet base around where the toilet connects to the drain pipe and sits on the floor.
If your toilet suddenly becomes wobbly, your closet flange is likely faulty. You will probably notice that it shifts slightly when you sit or stand or that your toilet leaks around the base every time you flush it.
Installing and replacing a toilet flange is more complicated than replacing a sink or bathroom flange. However, if you can comfortably remove and reinstall your toilet, you can probably do it on your own. If not, it would be good to reach out to your local plumber for assistance with this issue.
Final Thoughts
Drain flanges play an essential role in preventing leaks around your drains. With the tips outlined above, installing, replacing, and maintaining your drain flanges should be pretty easy.
Related article:
6 Common Reasons Why is Your Toilet Bubbling
8 Reasons Why Does Your Washing Machine Smell
How To Clean A Dryer In 10 Easy Steps: Today
How To Clean A Washer In 5 Easy Steps
Last update on 2023-04-16 / Affiliate links / Images from Amazon Product Advertising API